Getting Started
This guide walks you through setting up Git Connectivity for the first time: configuring a Git provider, connecting an app to a repository, and performing your first commit and pull operations. You need access to a supported Git hosting platform (GitHub, GitLab, or Bitbucket) with credentials for the repository you want to work with.
Step 1: Check that Git Connectivity is Enabled
Git Connectivity is enabled by default. To turn it off, set the following property in your Design application configuration:
flowable.design.git.enabled=false
If Git features are not available in your Design UI, check that this property has not been set to false and, in a custom build, that the starter below is on the classpath.
Adding the Git connectivity dependency to a custom build
In a custom Design build the Git connectivity starter is not included by default. Add the following dependency to the pom.xml of your Design application:
<dependency>
    <groupId>com.flowable.design</groupId>
    <artifactId>flowable-spring-boot-starter-design-git</artifactId>
</dependency>
Step 2: Assign Permissions
Before configuring a provider, make sure the users working with Git have the permissions they need:
- Manage Git providers (tenant privilege) or Manage Git provider (workspace scoped) - Required to create and manage Git provider configurations. Which one applies depends on whether the provider is global or belongs to a workspace.
- Manage Git (app scoped) - Required to connect apps to repositories and manage the Git configuration.
- Push to Git (app scoped) - Required to commit and push changes, and to create branches and pull requests.
Pulling, switching branches, reverting, and stashing are covered by the app's Edit package permission instead, so a user who may edit the app can already do those.
These permissions are granted through the roles assigned to a user. See Custom roles for how to configure roles and their permissions.
 note
noteAdministrators have these permissions by default, so this step is only needed for other users.
Step 3: Configure a Git Provider
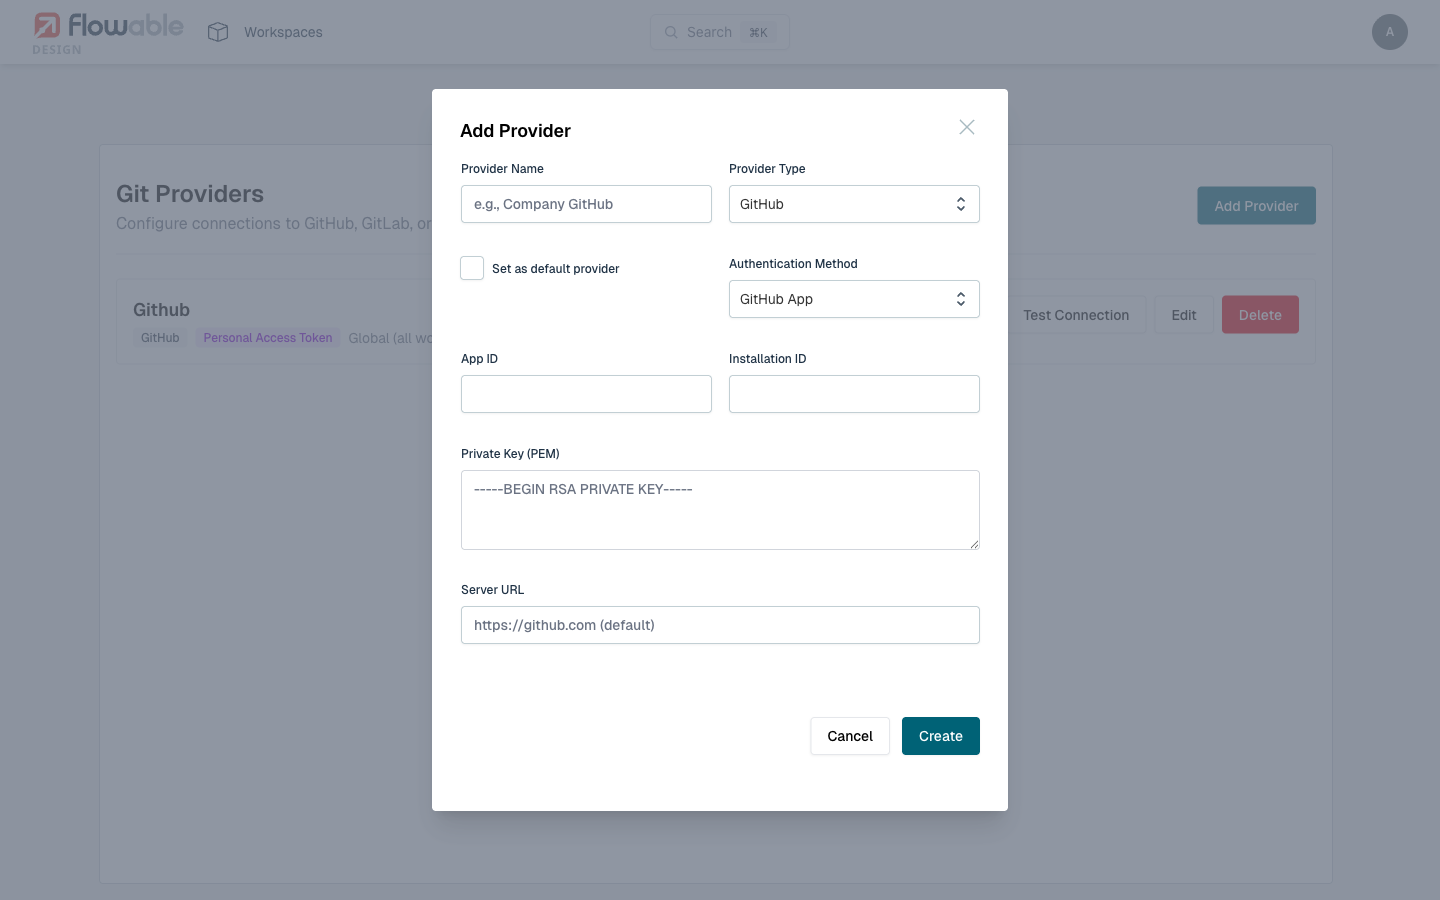
Before connecting any app to a repository, you need to configure at least one Git provider. A provider defines how Design authenticates with your Git hosting platform.
- Navigate to the Git Providers management page in Design.
- Click Add Provider.
- Select a provider type (GitHub, GitLab, or Bitbucket).
- Fill in the required fields:
- Name - A descriptive name for this provider configuration.
- Server URL - The URL of your Git hosting server (e.g.,
https://github.com,https://gitlab.com, or your self-hosted instance). - Authentication details - Depending on the provider type, this may include a Personal Access Token, SSH key, or GitHub App configuration.
- Click Test Connection to verify that Design can connect to the Git server with the provided credentials.
- Save the provider configuration.
 tip
tipFor a quick start, using a Personal Access Token (PAT) is the simplest authentication method for GitHub and GitLab. For organizational use, consider a GitHub App configuration for better access control.
Step 4: Connect an App to a Git Repository
There are two ways to connect a Design app to a Git repository:
Option A: Clone from Git
Use this option when you have an existing Git repository that already contains Flowable models, or when you want to start with a fresh repository.
- Navigate to your workspace.
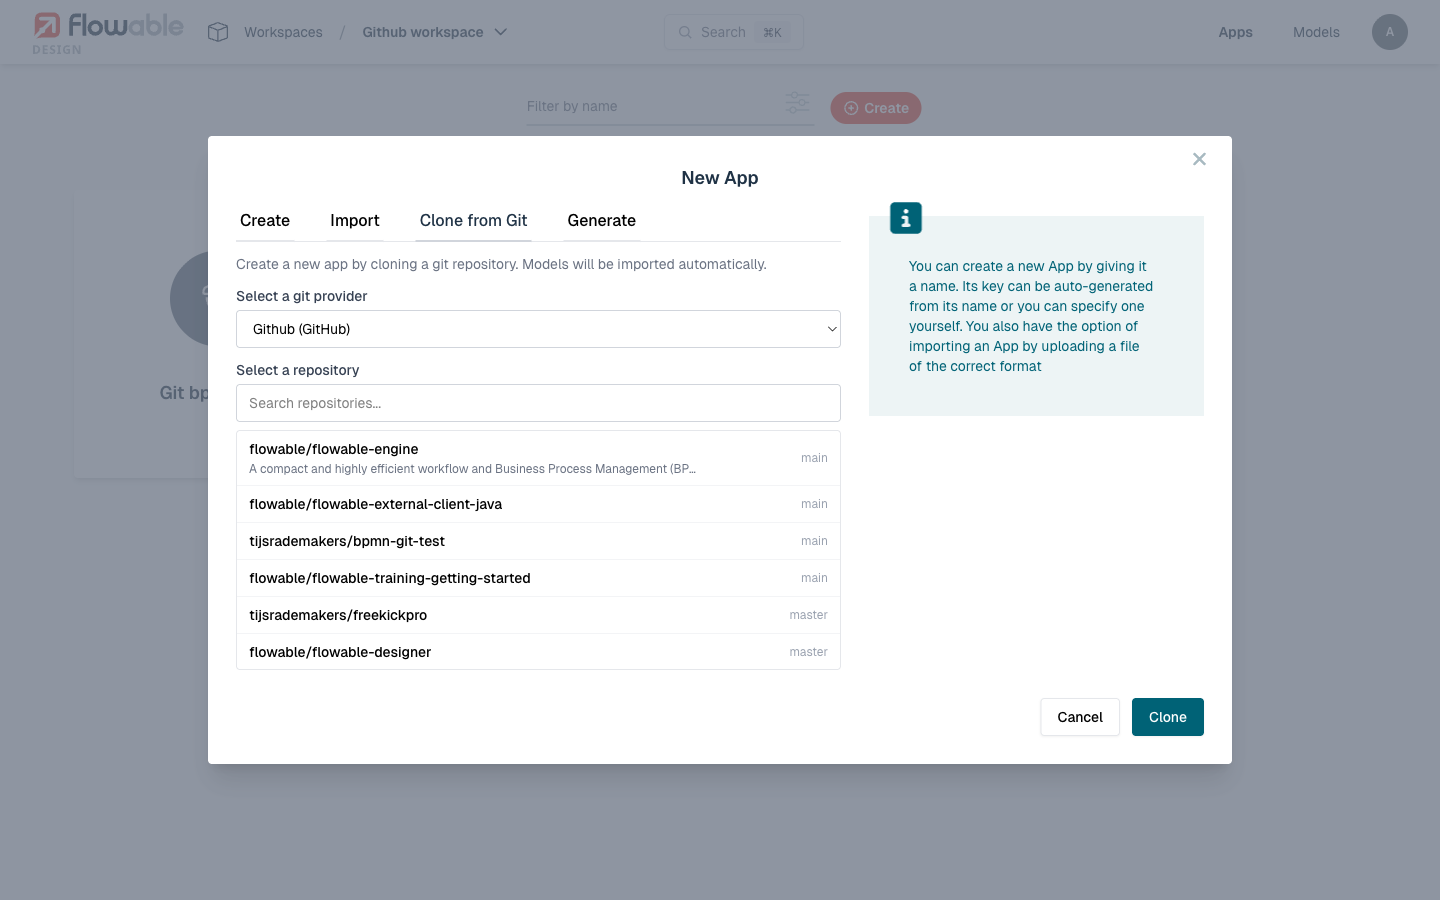
- Choose the Clone from Git option.
- Select the Git provider to use.
- Enter the repository URL or browse available repositories (for GitHub, GitLab, and Bitbucket providers).
- Select the branch to clone (default:
main). - Optionally specify a sub-path if the models are located in a subdirectory of the repository (monorepo setup).
- Click Clone to create the app package from the repository contents.
Option B: Connect an Existing App
Use this option when you already have a Design app and want to start tracking it in Git.
- Open the app you want to connect.
- Open the Git panel and choose Setup Git.
- Select the Git provider to use.
- Enter the repository URL or browse available repositories.
- Select the branch.
- Optionally specify a sub-path for monorepo setups.
- Click Setup to establish the connection.
 info
infoWhen connecting an existing app to a repository that already contains models, Design will detect any differences between the local app and the remote repository. You may need to resolve divergences before proceeding.
Step 5: Your First Commit
Once your app is connected to a Git repository, any changes you make to models will be tracked by Git.
- Make a change to one of the models in your app (for example, edit a BPMN process or a form).
- Open the Git panel on the app details page.
- You will see the changed models listed with their modification status.
- Click Commit.
- Select which models to include in the commit (or select all).
- Write a descriptive commit message explaining what changed and why.
- Click Commit to push the changes to the remote repository.
Step 6: Pull Remote Changes
When other team members push changes to the repository, you can pull those changes into your local app.
- Open the Git panel on the app details page.
- The status banner will indicate if remote changes are available.
- Click Pull to fetch and apply the remote changes.
- If there are no conflicts, the changes are applied and the app is updated.
- If conflicts are detected, you will be guided through the conflict resolution process.
What's Next
Now that you have a Git-connected app, explore these topics to get the most out of Git Connectivity:
- Sync Status - Understand the status indicators in the Git panel.
- Branching - Learn how to work with branches.
- Commit and Pull - Detailed reference for commit and pull operations.
- Daily Git Workflow - A practical guide to using Git Connectivity day-to-day.